One of the best features Oculus Quest 2 Can it be manually linked via USB to your gaming PC to play the most demanding VR games that you cannot play locally on a headset. This is great if you want a way to play games like Half Life: AlexAnd the But the obvious downside is that you are now physically connected to a computer – much for the wireless freedom Quest 2 advertises.
Thankfully, the developers have already figured out what seems impossible: how to play system-intensive addresses on your PC and stream visual feed to your VR device while all your movements are synced over Wi-Fi. It gives you the best of both worlds: It allows you to play the games you want without connecting a cable to your computer.
Doing so is not as simple as installing an app through the Oculus store; There are several steps involved. I’ll walk you through the steps required to make this happen on the Quest 2. Virtual Reality Headset. The same steps will likely work on the first mission iteration, but I only have the latest model here to test.

Photo by Amelia Hollowate Kralese / The Verge
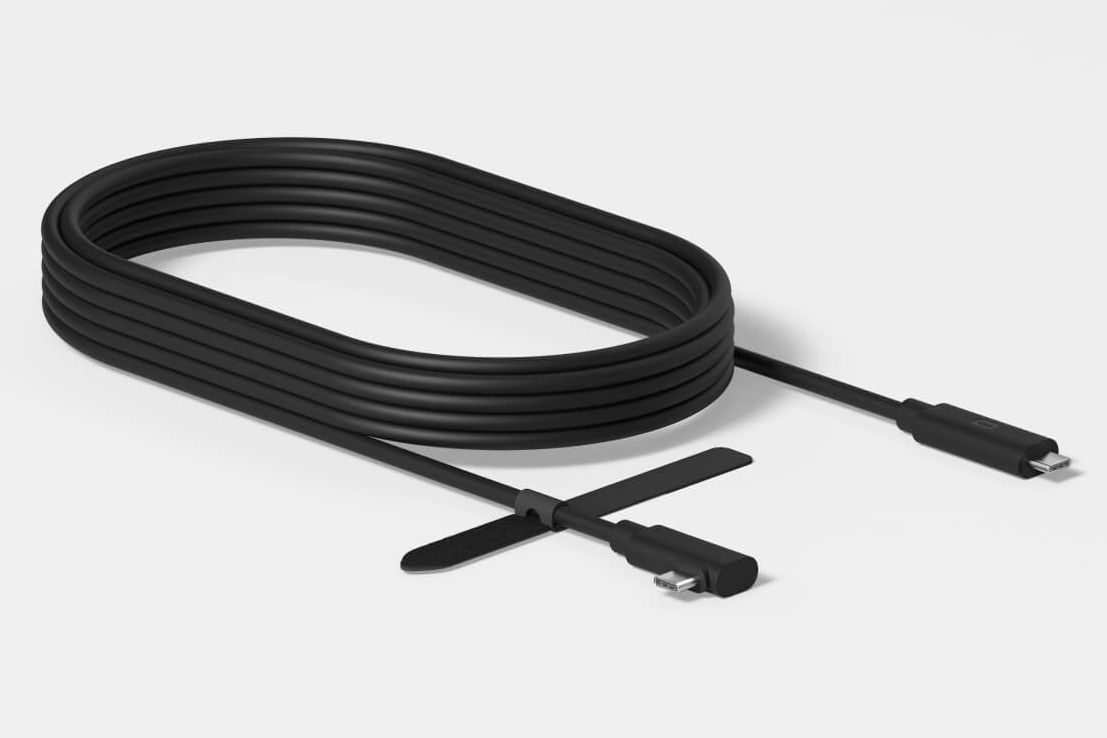
Obtain a connecting cable
Although this is a way to experience virtual reality without wires, you will need a wire to start. Oculus sells an expensive 16-foot cable For about $ 80, But this is for people who really want to use Quest 2 in wired mode. There are other, less expensive alternatives, such as Anker USB-C to USB Type-A 3.0 Cable 10ft, Which costs about $ 20 and gets the job done.
Many of the USB cables that come with modern Android phones will also likely work. And the cable doesn’t have to be long – we’re just doing a few simple data transfers here. Unfortunately, the USB-C cable included with Oculus did not work with every Quest 2 for this process when I tried it. It is simply to charge the headphone.
Activate developer settings
If you want to upload files to Quest 2, you will need a developer account. Fortunately, this is easy to do, but it is a strange process that the actual developers are supposed to use.
- Go to this page Log in to your Facebook account in the browser of your choice. Just make sure you are signed into the same Facebook account you are logged into on Quest 2.
- The next part of the process is to name „your organization.“ You can call it whatever you want. You can find a direct link to this page Here If I get lost.
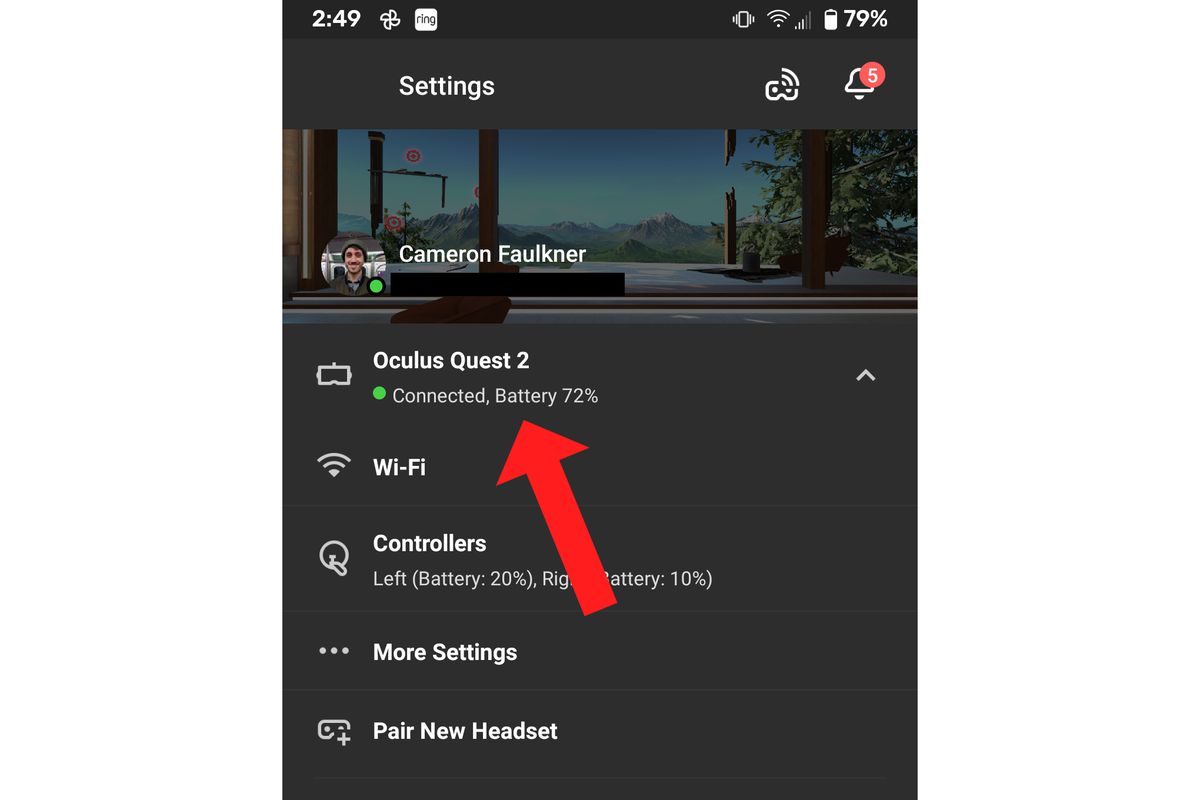
- After these two steps out of the way, open the Oculus mobile app (iOS or Android) and log in with the same Facebook account. Then go to the „Settings“ pane by clicking on it in the lower-right corner of the application window.
- On the next page, click „Oculus Quest 2″ just below your name, and some other options will expand within it. Click More Settings“
- Once you are there, click on „Developer Mode“ and turn it on
Install Quest 2 Driver for your computer
The next two steps pave the way for you to download software to the Quest 2 Headset, a feature usually reserved for developers. If you are using a Windows PC, you will need to install ADB drivers to allow your computer to write to headphone; According to Oculus, macOS and Linux do not require a driver.
- Download the linked program here, Hosted by Oculus. (Simply check the box indicating that you agree to the terms of the license – you can read it if you like – and click ‚Download.‘)
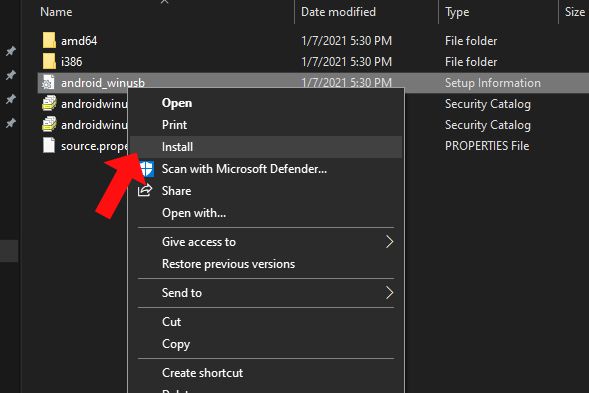
- Once downloaded, extract the contents of the folder. Then right-click on the item named „android_winusb.inf“ and select „Install“.
Purchase the Virtual Desktop Application for Quest
Virtual Desktop allows you to access your computer through the lens of a VR headset. You can use it for games, as we will do, but you can also watch movies that you have stored on your computer in a variety of different virtual environments. There is a Quest version of the app that you can purchase here for $ 20. (Make sure it says it’s compatible with Quest under the Buy button.)
After purchasing it, install it on the headphone. We’ll be back to this app in a little while, but for now, a few more steps.
Connect Quest 2 to your PC
Connect your Quest 2 via the side-mounted USB-C to the fastest USB port available on your computer. If you’ve done everything correctly up to this point, you’ll see a message displayed in the headset asking if you want to allow USB debugging. Allow it to move forward.
Download and install SideQuest on your computer
Side goal It is a free app and storefront for experiences that can be downloaded on headphones. For the purposes of this method, you’ll only use it to apply a necessary patch to the Virtual Desktop application you just suggested purchasing and installing on your Quest 2 headset.
- Head here to find the right installer for your operating system (I used the Windows 10 version for this method) and download it
- Once the installation is finished, launch SideQuest
- At this point, your headphone should appear as connected in the upper-left corner of the SideQuest app on your computer with a green bubble. If it does not display as connected, check the headphone screen for a prompt. It might be waiting for you to allow your computer to access and modify Quest 2’s file system.

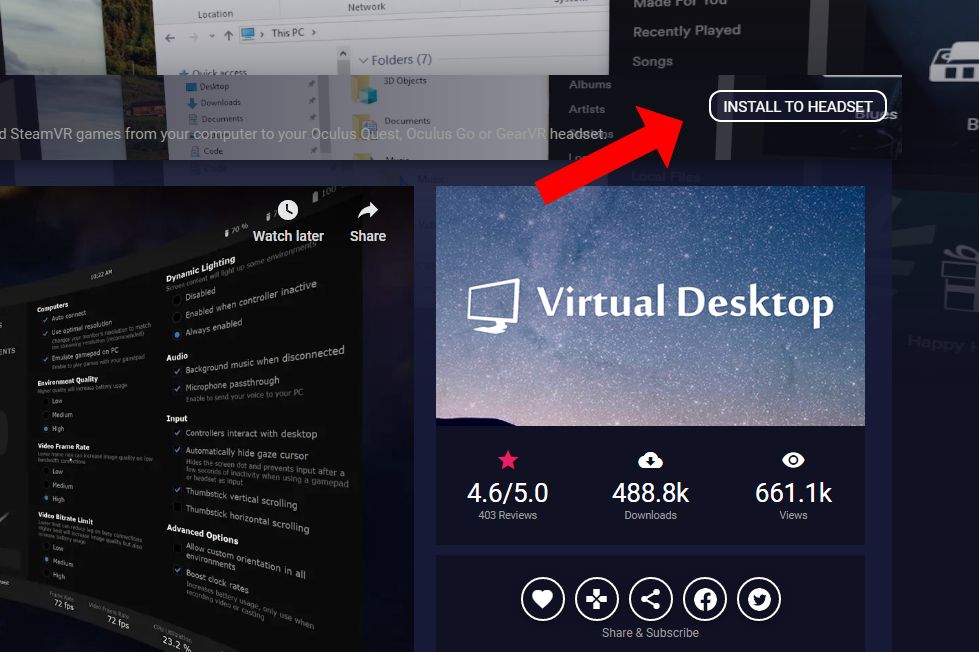
Sideload the Virtual Desktop VR patch for Quest 2
On SideQuest, type „Virtual desktop“ in the search bar. The result you are looking for is called „Virtual Desktop VR Patch“. This is the necessary key to trick your PC into believing Quest 2 is a wired headset.
- With Quest 2 connected to your computer, press the „Install to Headset“ button in SideQuest, located under the app’s search bar. The process should be very fast, and it only lasts a few seconds.
Download Virtual Desktop Streamer
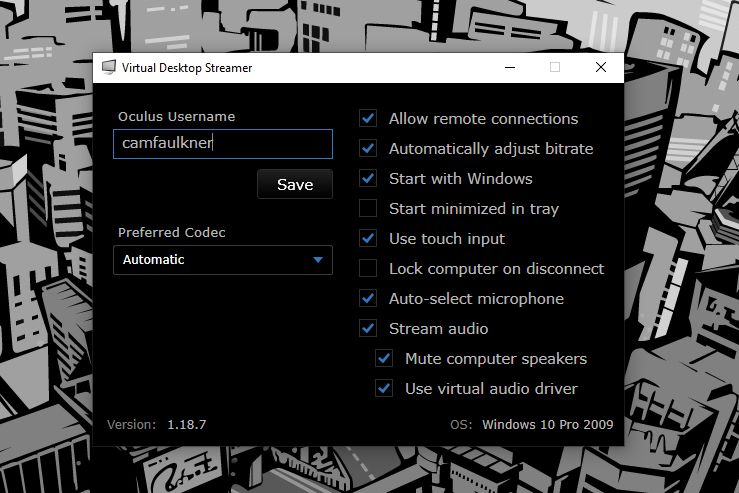
There is still another free app to download: Virtual Desktop Streamer. Designed by the same people who made the Virtual Desktop app that you purchased from Quest 2, this app simply streams computer content to your headphone over Wi-Fi.
- Once you download and install this app, you will need to enter your Oculus username in the Streamer window
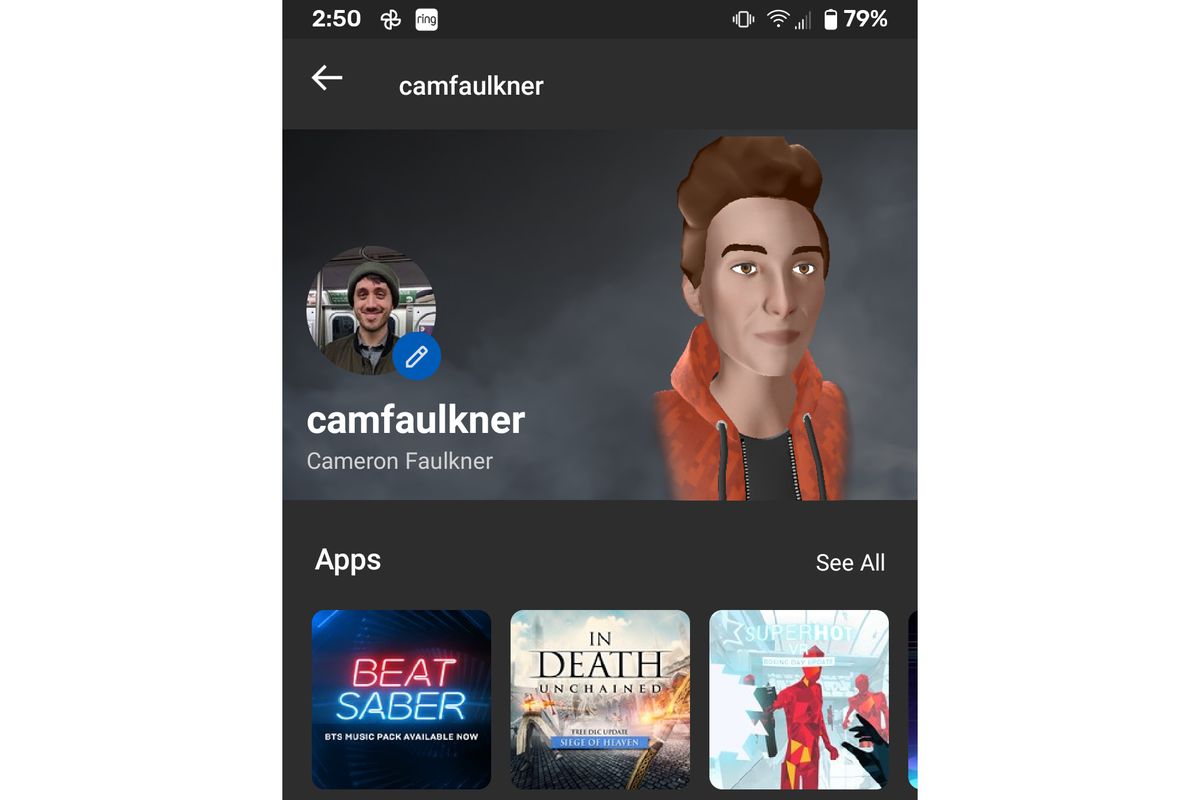
- If you don’t know it from the top of your head, you can find it by opening the Oculus mobile app, going to ‚Settings,‘ and then clicking on the area that displays your name and email address. The name that will be displayed next to your avatar is your username.
- After entering it, press „Save“
- This is the last step! But remember, it is necessary to open the Virtual Desktop Streamer application in order for your headphone to be able to connect to your computer.
Open Virtual Desktop on Quest 2
If each step is done correctly, you’ll see your computer pop up in the list of devices available to connect to from within the Virtual Desktop application on Quest 2.
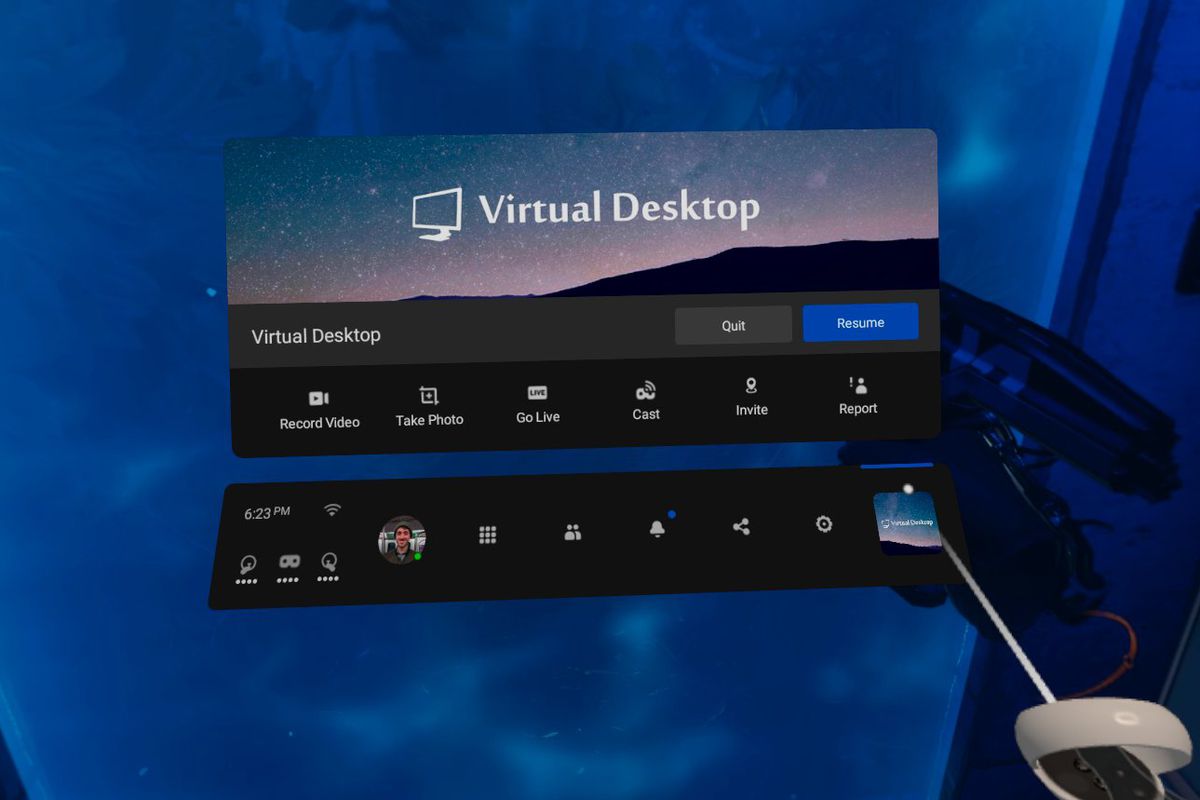
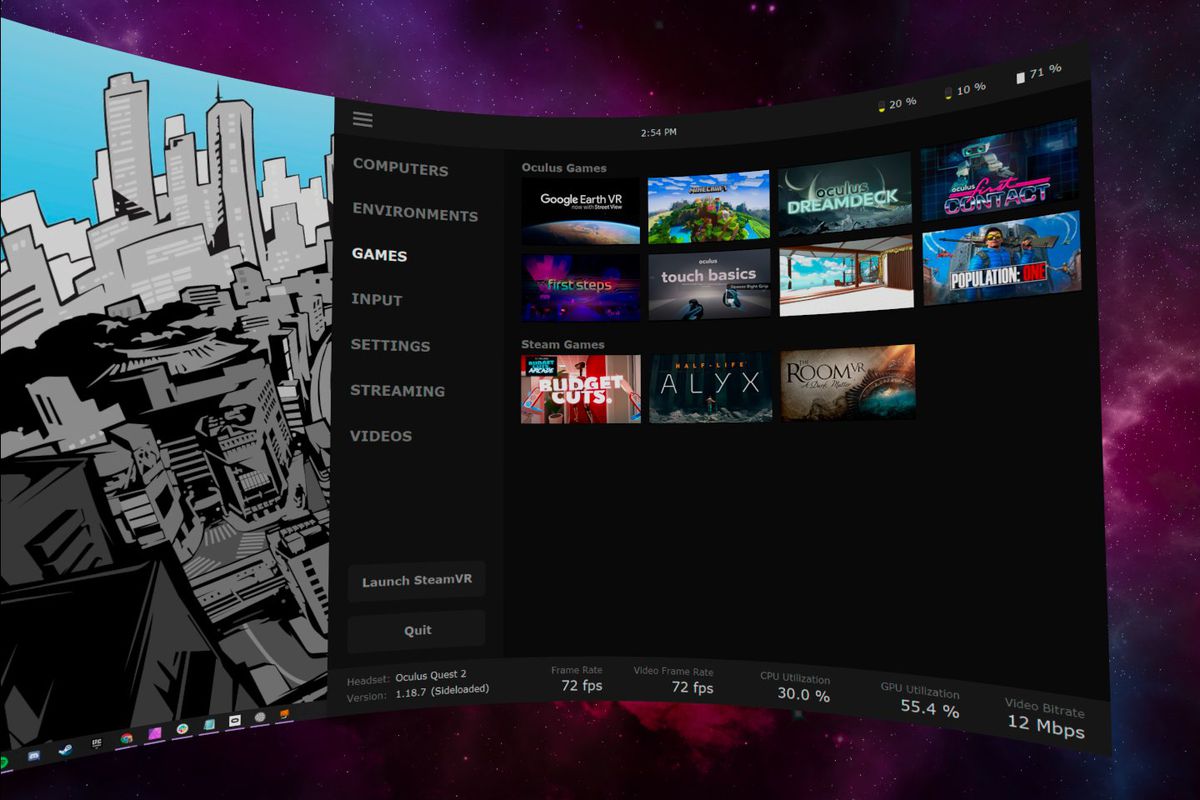
Once connected, the Options button (the Oculus Touch console equivalent to the left Oculus button) is set to open the top-level menu for the virtual desktop, as shown in the image below. From there, clicking on Games will bring up every game installed on your computer. You can simply run each one from there, and your computer will handle all the hard work.
If you are not satisfied with the visual resolution within each game, you are free to customize a few settings that affect latency, refresh rate, and more. Note that you will likely get a clearer and more flexible picture if your computer is powerful and your internet connection is fast. Since you depend on your own Wi-Fi, your wireless router plays a big role in providing a smooth experience as well.
Streaming VR over Wi-Fi is definitely not an ideal solution. I have a internet ready Wi-Fi 6 router and relatively fast internet (235Mbps down, 19Mbps up), and I’m still experiencing occasional lag and a little blurry picture. Despite enough tweaking in the Virtual Desktop app (turning off Wi-Fi on technical items that rarely harms it), I think you’ll have a good time.

„Bacon ninja. Alcohol guru. Proud explorer. Passionate pop culture enthusiast.“